
Men’s Jeans to Toddler Pants Tutorial
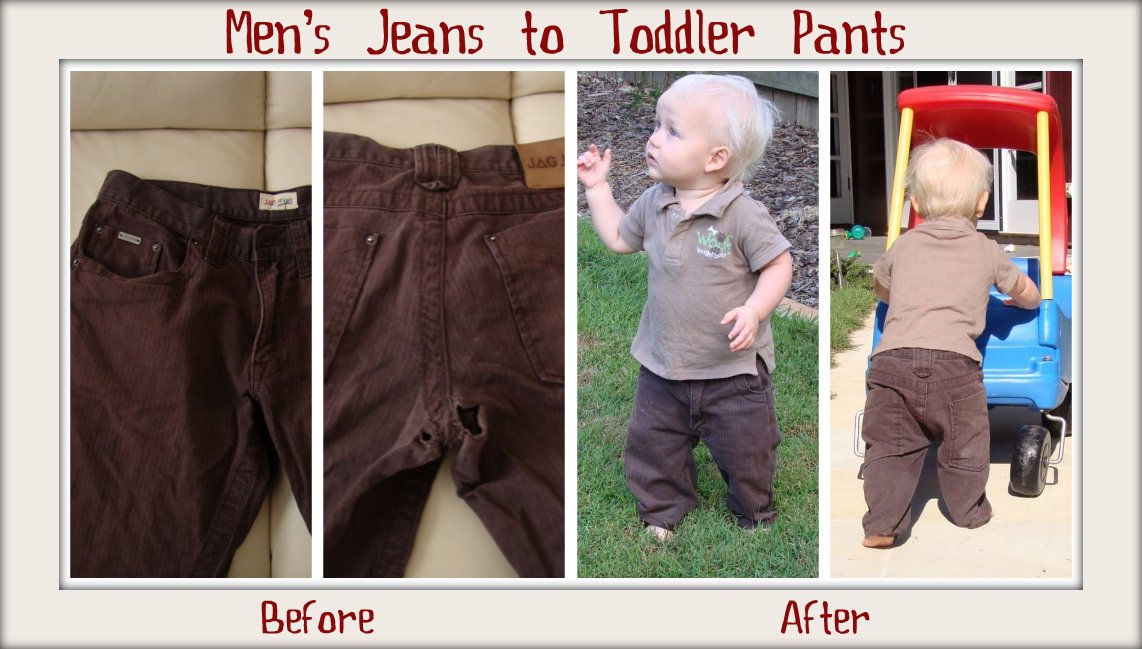
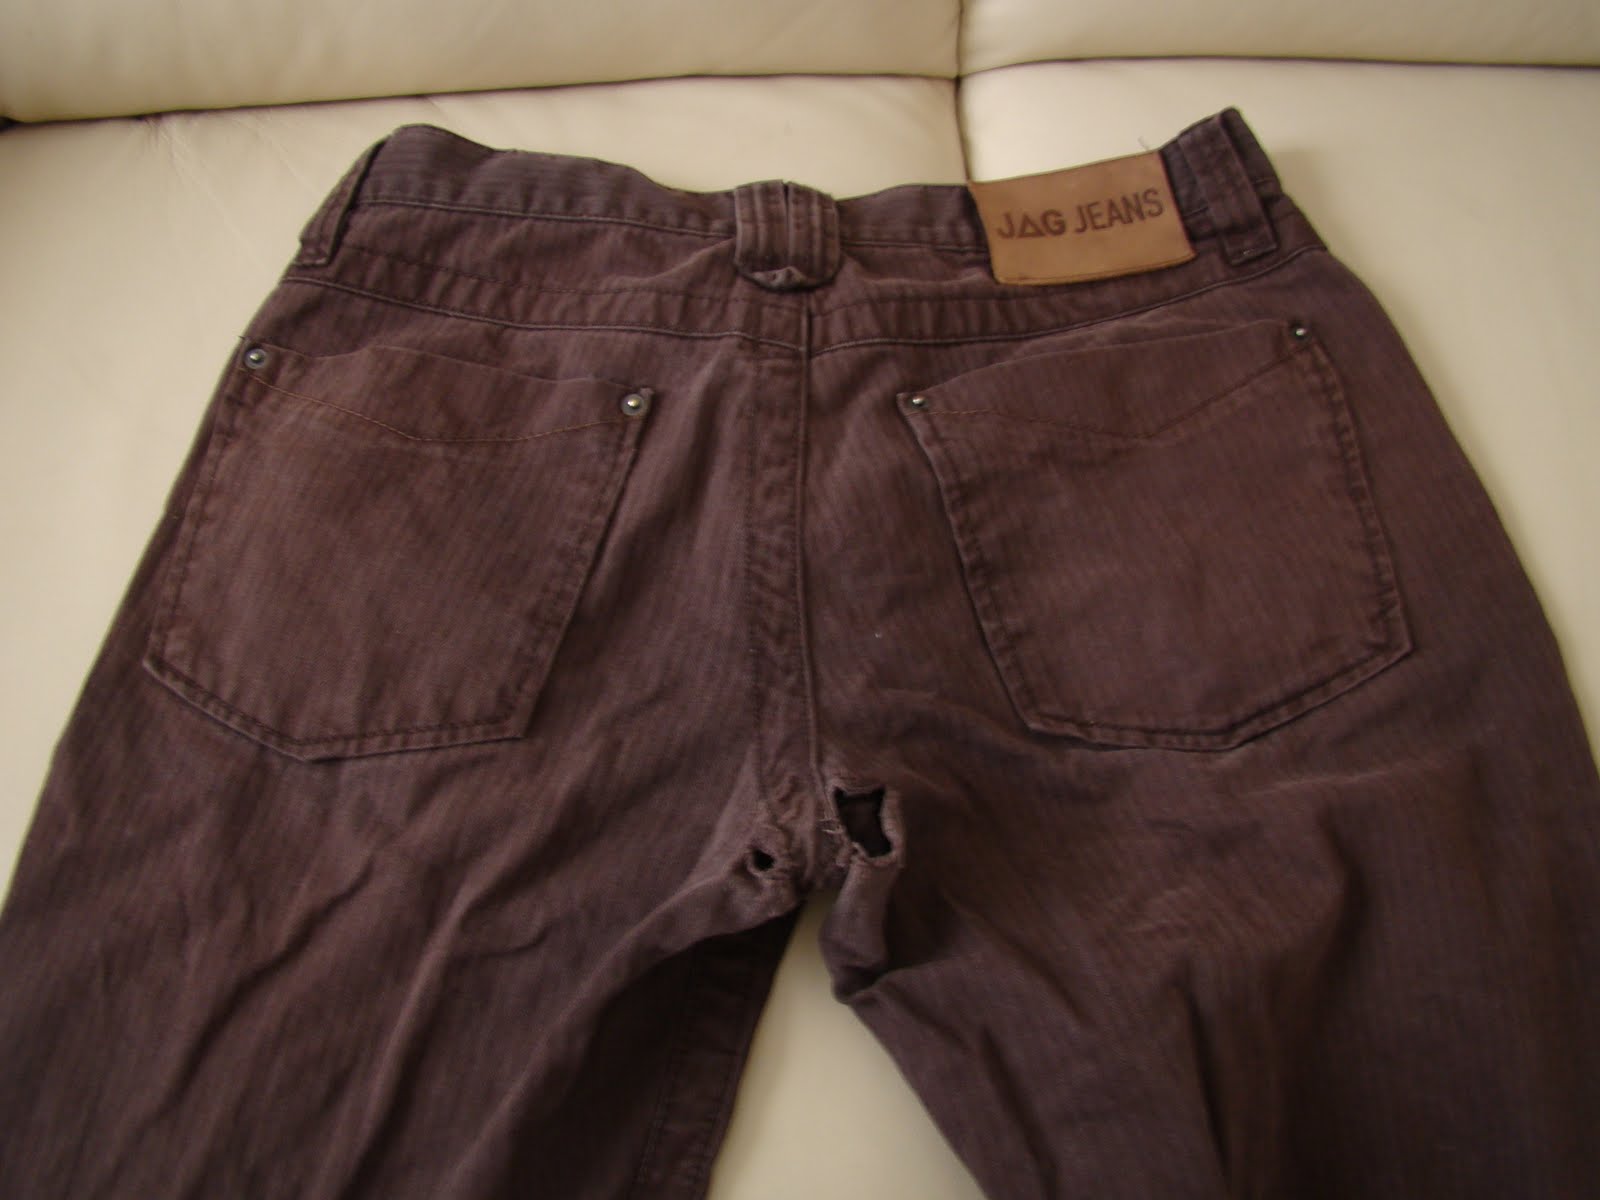
I’ve seen a few blog posts for converting men’s pants or jeans to toddler-sized jeans, but they all seem to involve a lot of seam-ripping, deconstructing and lots of sewing. I was after a quicker and easier way – I get limited time at the sewing machine each week, and I want to see results! Also, the pants I had picked up cheaply at the thrift store had an unfortunate blow-out, so I needed to work around this:
I prefer flat-front pants (where there is only elastic in the back) as I think they look a bit snazzier, but you could erasily do this with a full elastic waist. Here’s my quick and easy method to convert thrifted mens pants into toddler/boy pants:
Materials Required
Men’s jeans or pants
Elastic to fit in waist-band (I about 9 inches of 1/2 inch wide elastic)
Thread
Sewing Machine
Serger/Overlocker (optional)
Scissors
Seam ripper
Procedure
Step 1. Create pattern from an existing pair of toddler pants (preferably flat-front pants) – for a great tutorial on this, check out the one here at MADE (a fabulous blog, if you haven’t check it out before!).
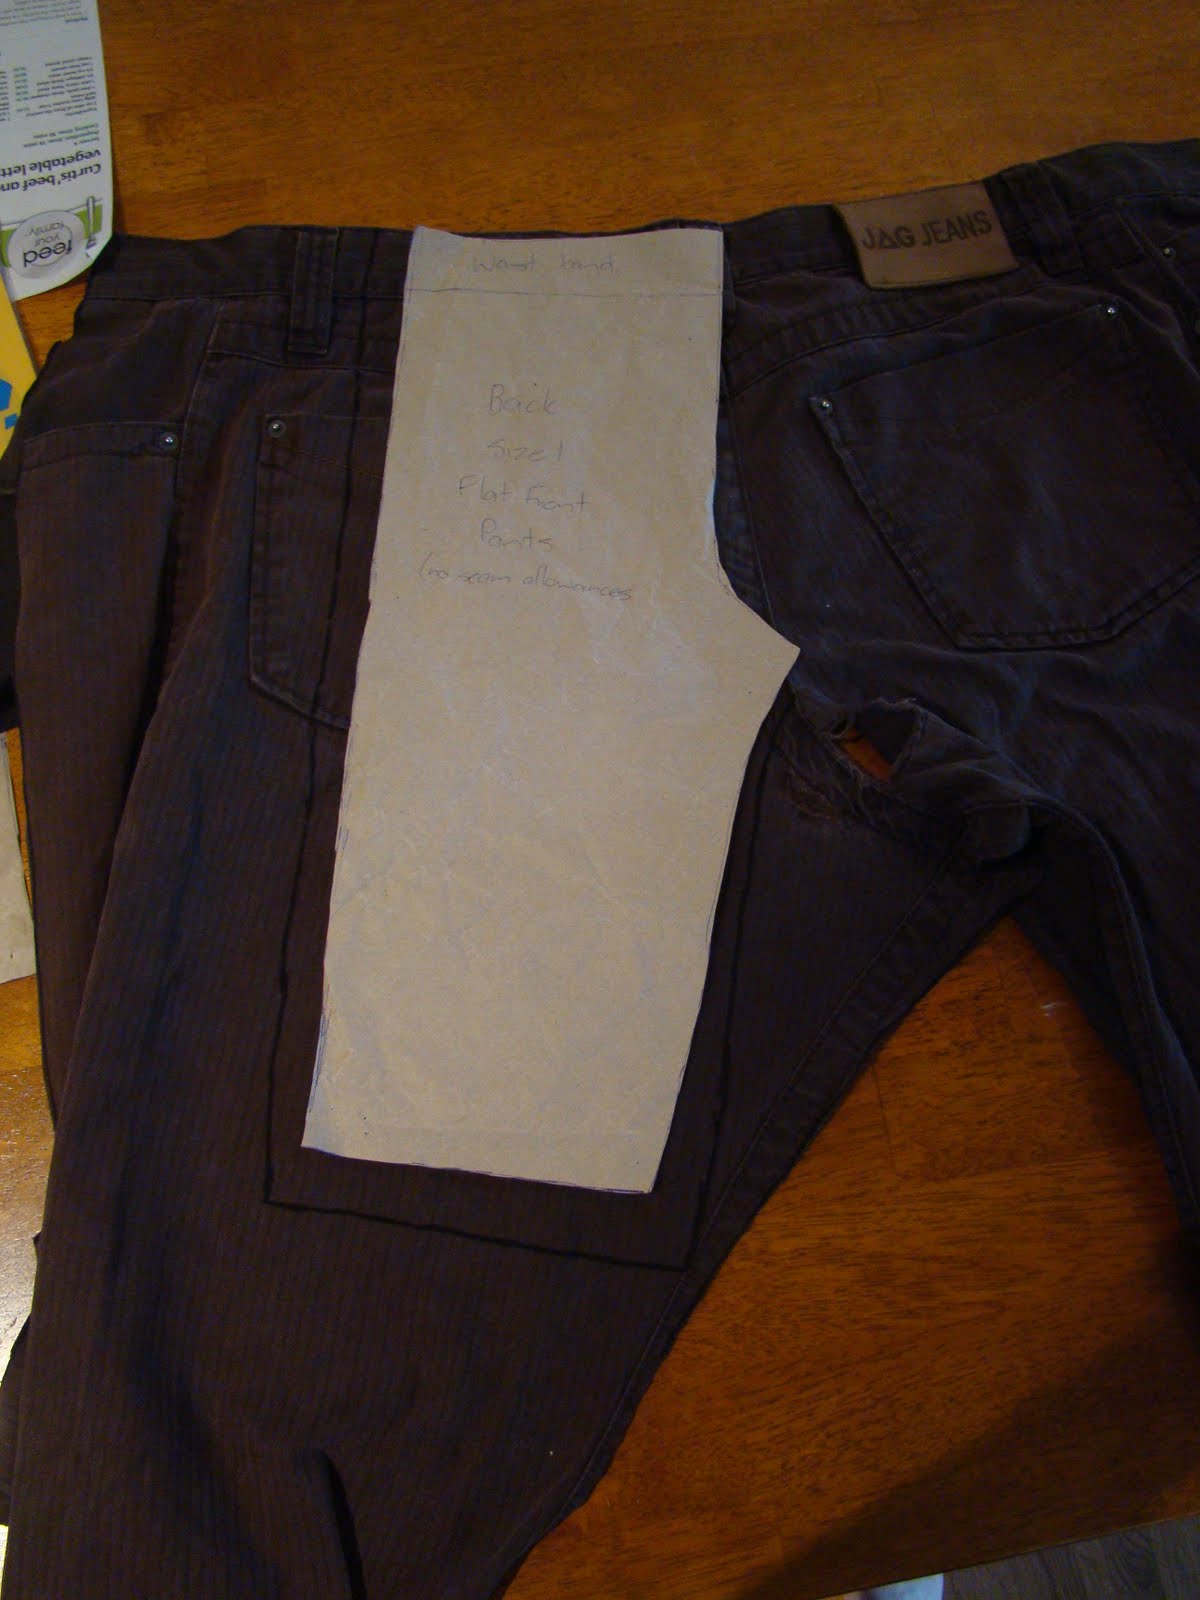
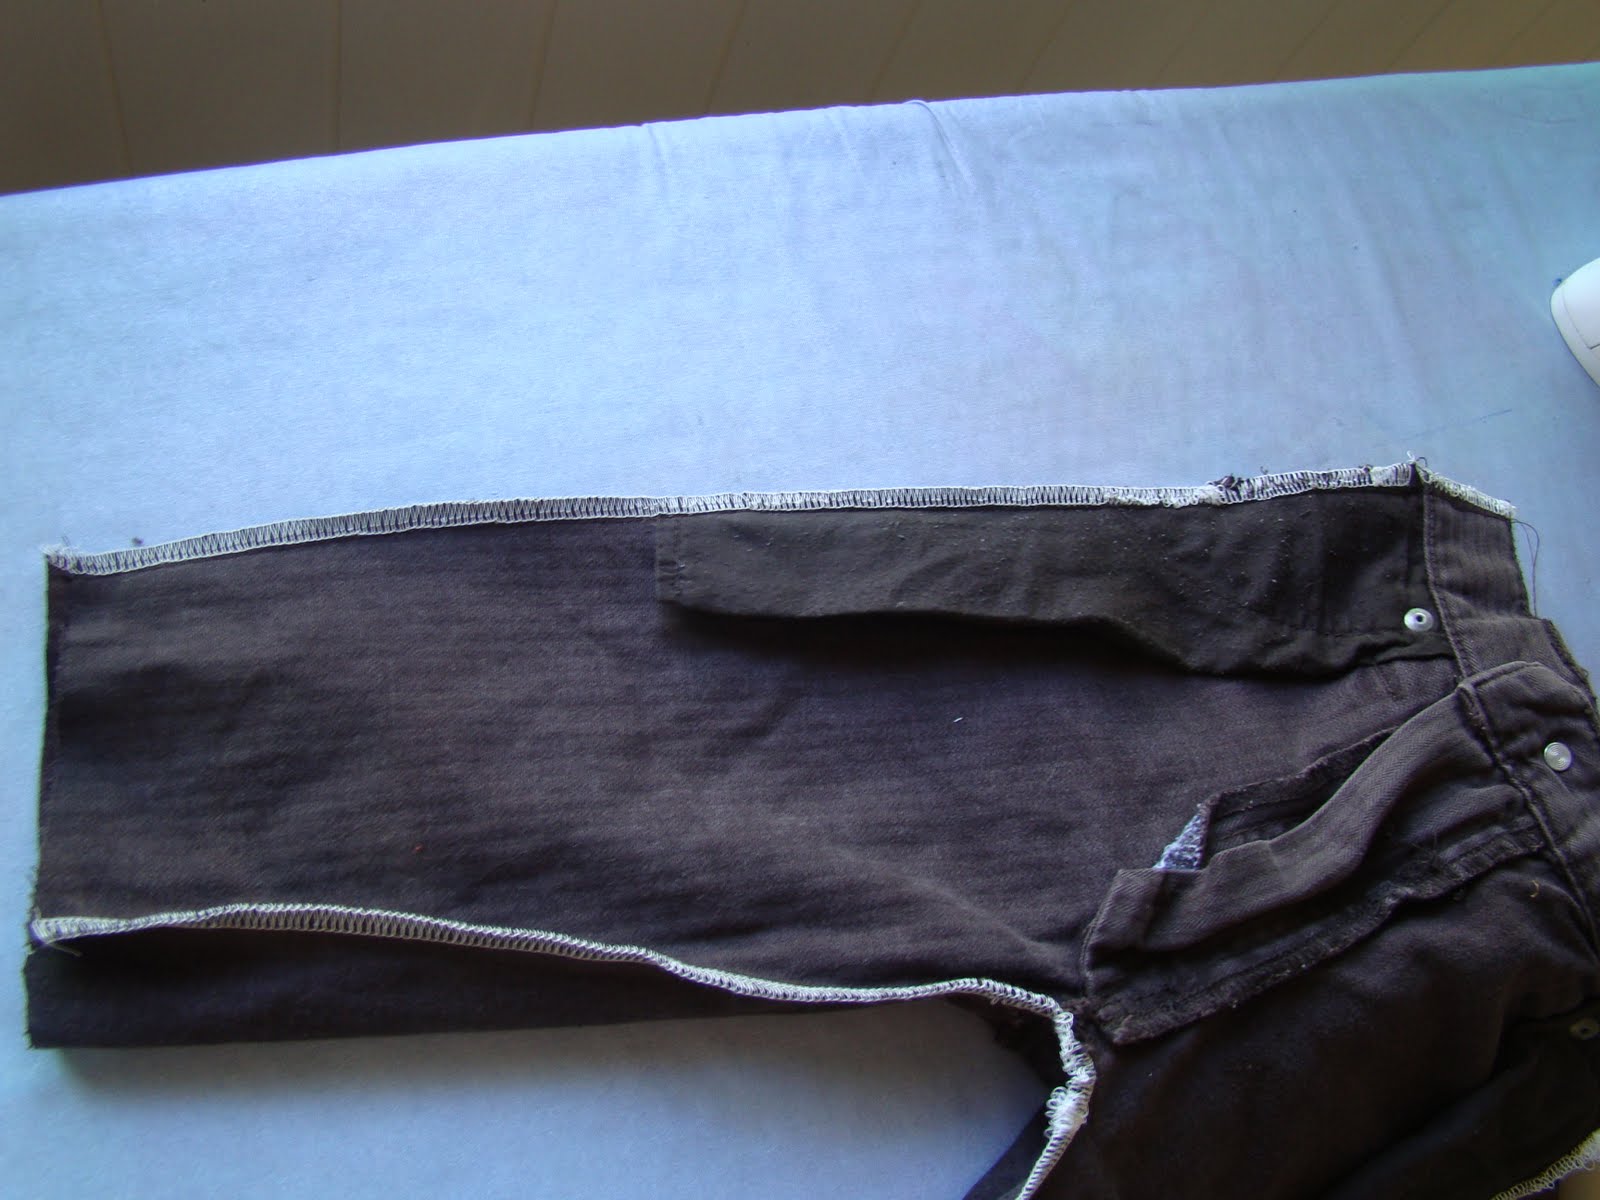
Step 2. Line up front pattern piece along the fly/centre seam and the waistband of the men’s pants, and trace/cut out the pattern piece (but not along the fly/centre seam, making sure you don’t cut into the back of the pants!) Cut straight through the pockets, waistband etc.:
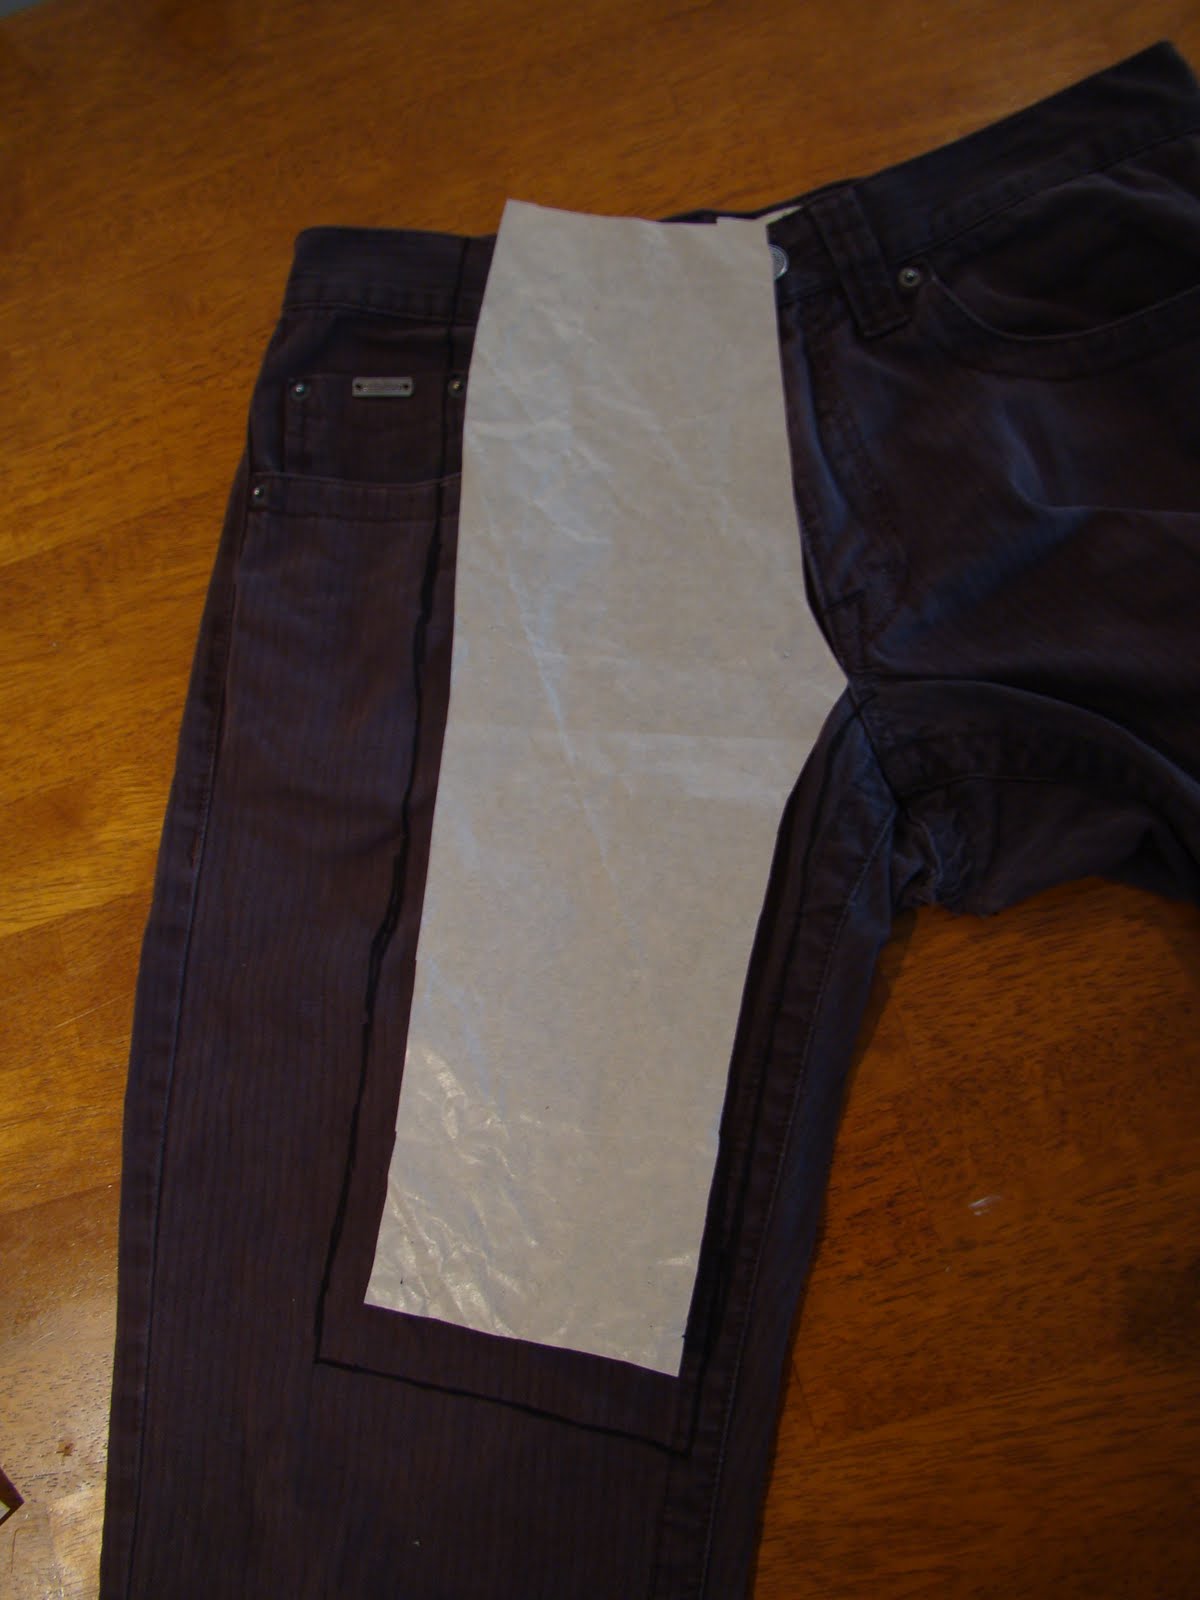
(Note: the pattern pieces won’t line up perfectly with the curve of the centre seam, but it shouldn’t make much difference to the fit of the pants.)
Step 3. Flip the pattern piece to the other side of the centre seam, and repeat, so you end up with a single piece for the front of the pants:
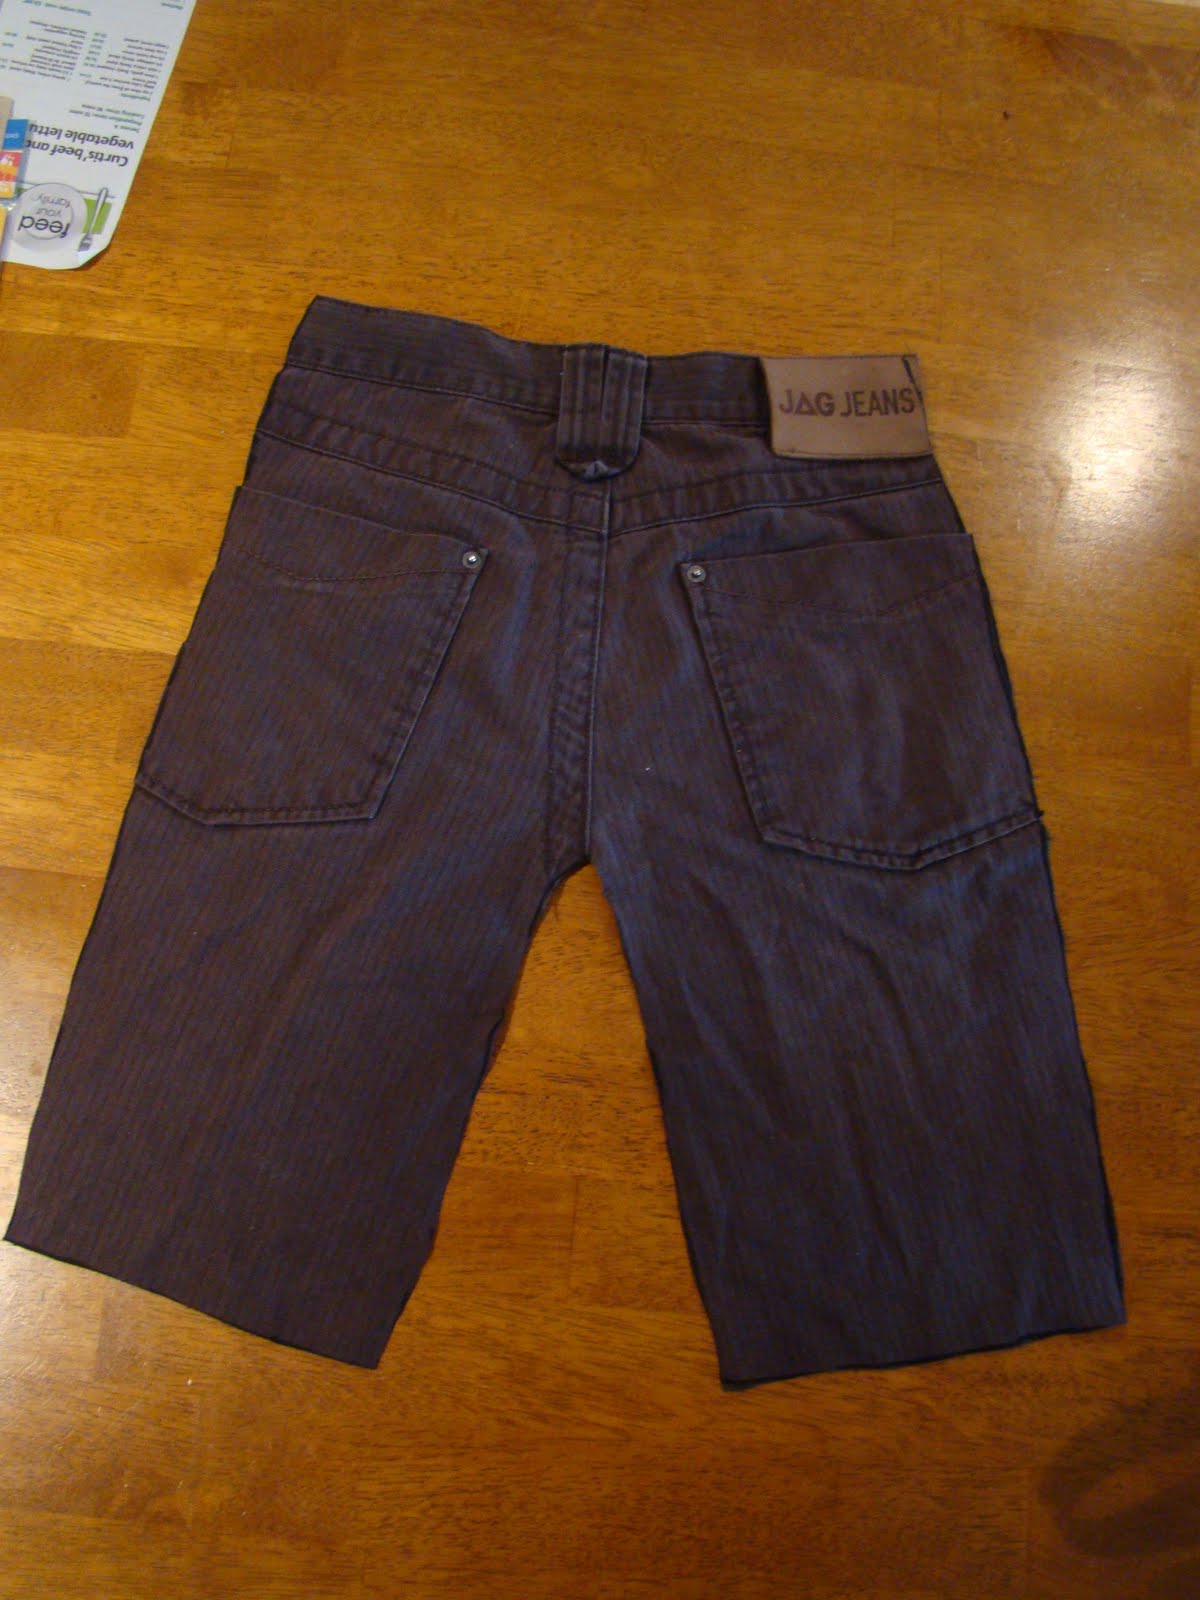
Step 4. Repeat for the back pattern pieces on the back of the pants:
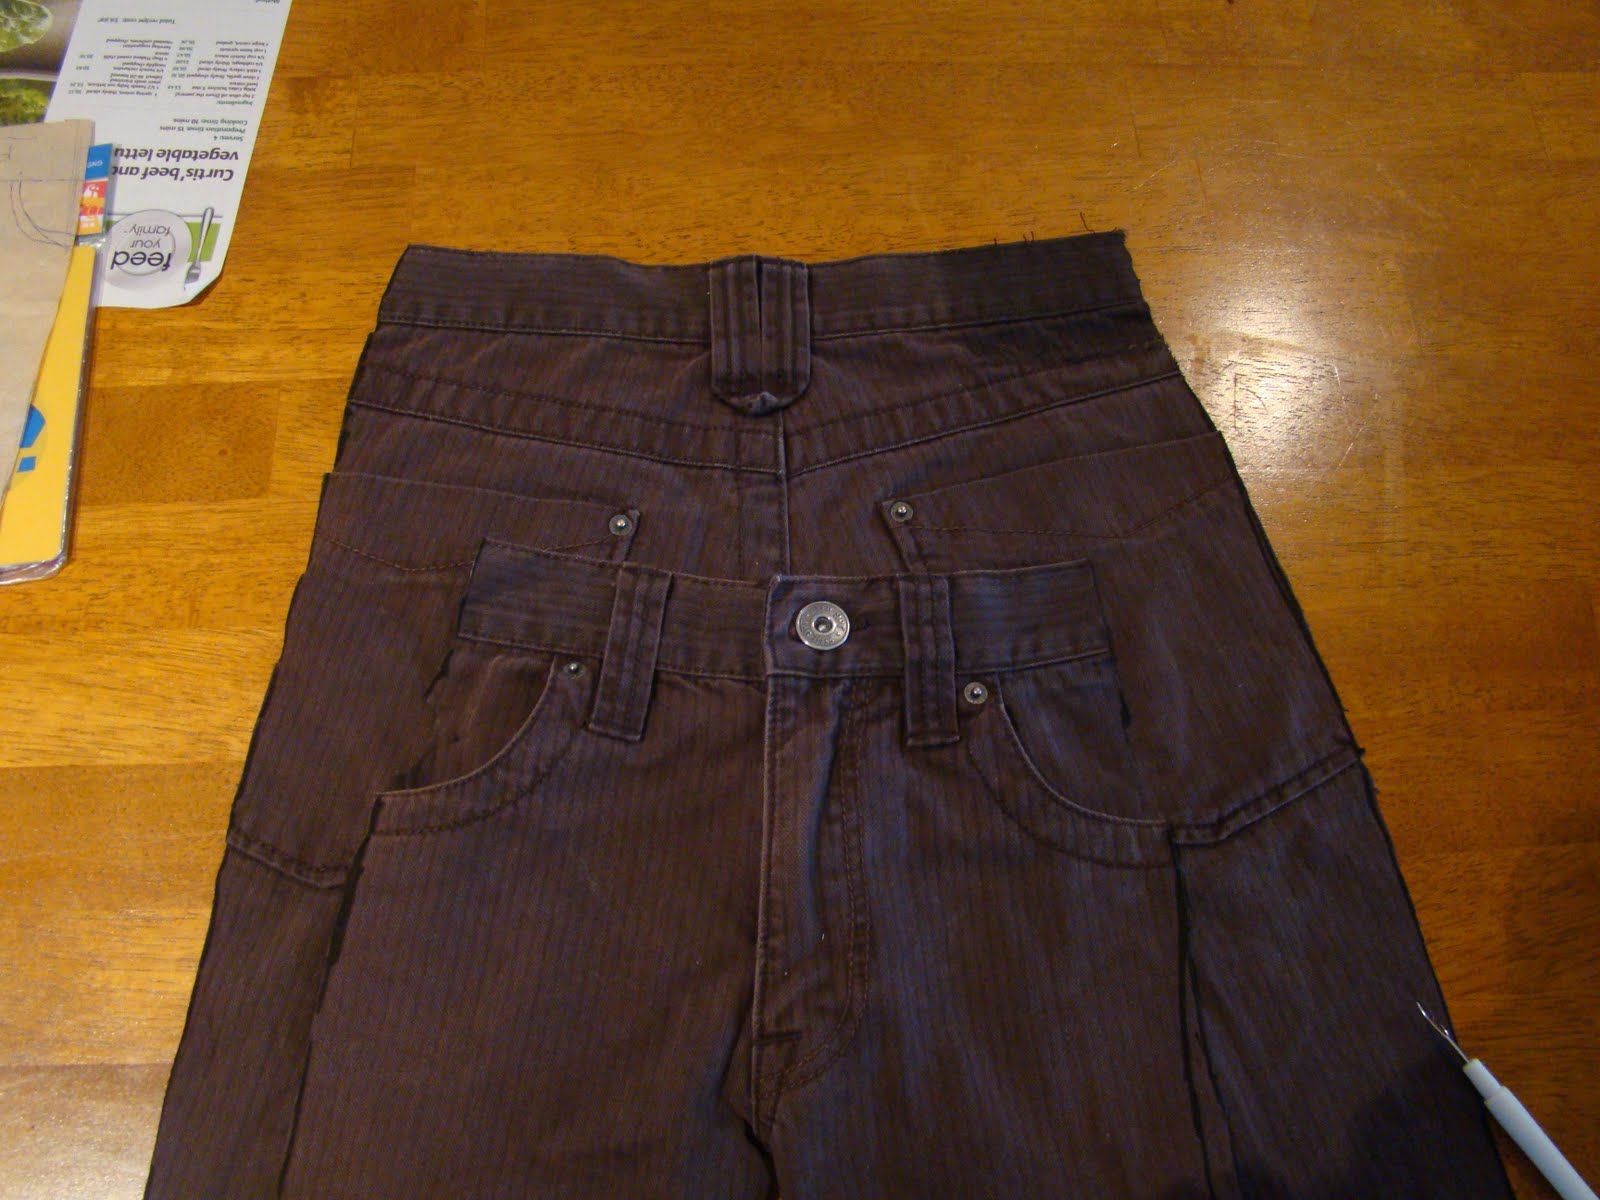
Step 5. Remove any studs, labels or excess pocket material in the seam allowances that will be difficult to sew through. I removed the leather back label, the small coin pocket that had one side seam showing, including the stud. I tried to prise off the stud with pliers but ended up just cutting it off as it was in the seam allowance).
Step 6. Pin together the front and back pieces, with right sides of the material together, in the inner leg/crotch area, and sew together. I used my serger/overlocker first (yes, I only have white thread for my overlocker!), and then sewed the seam with brown thread on my sewing machine to make sure the white thread doesn’t peep through. (Note: I prefer to overlock before sewing as I’m not very confident with my new overlocker – do it the other way around if you prefer.)
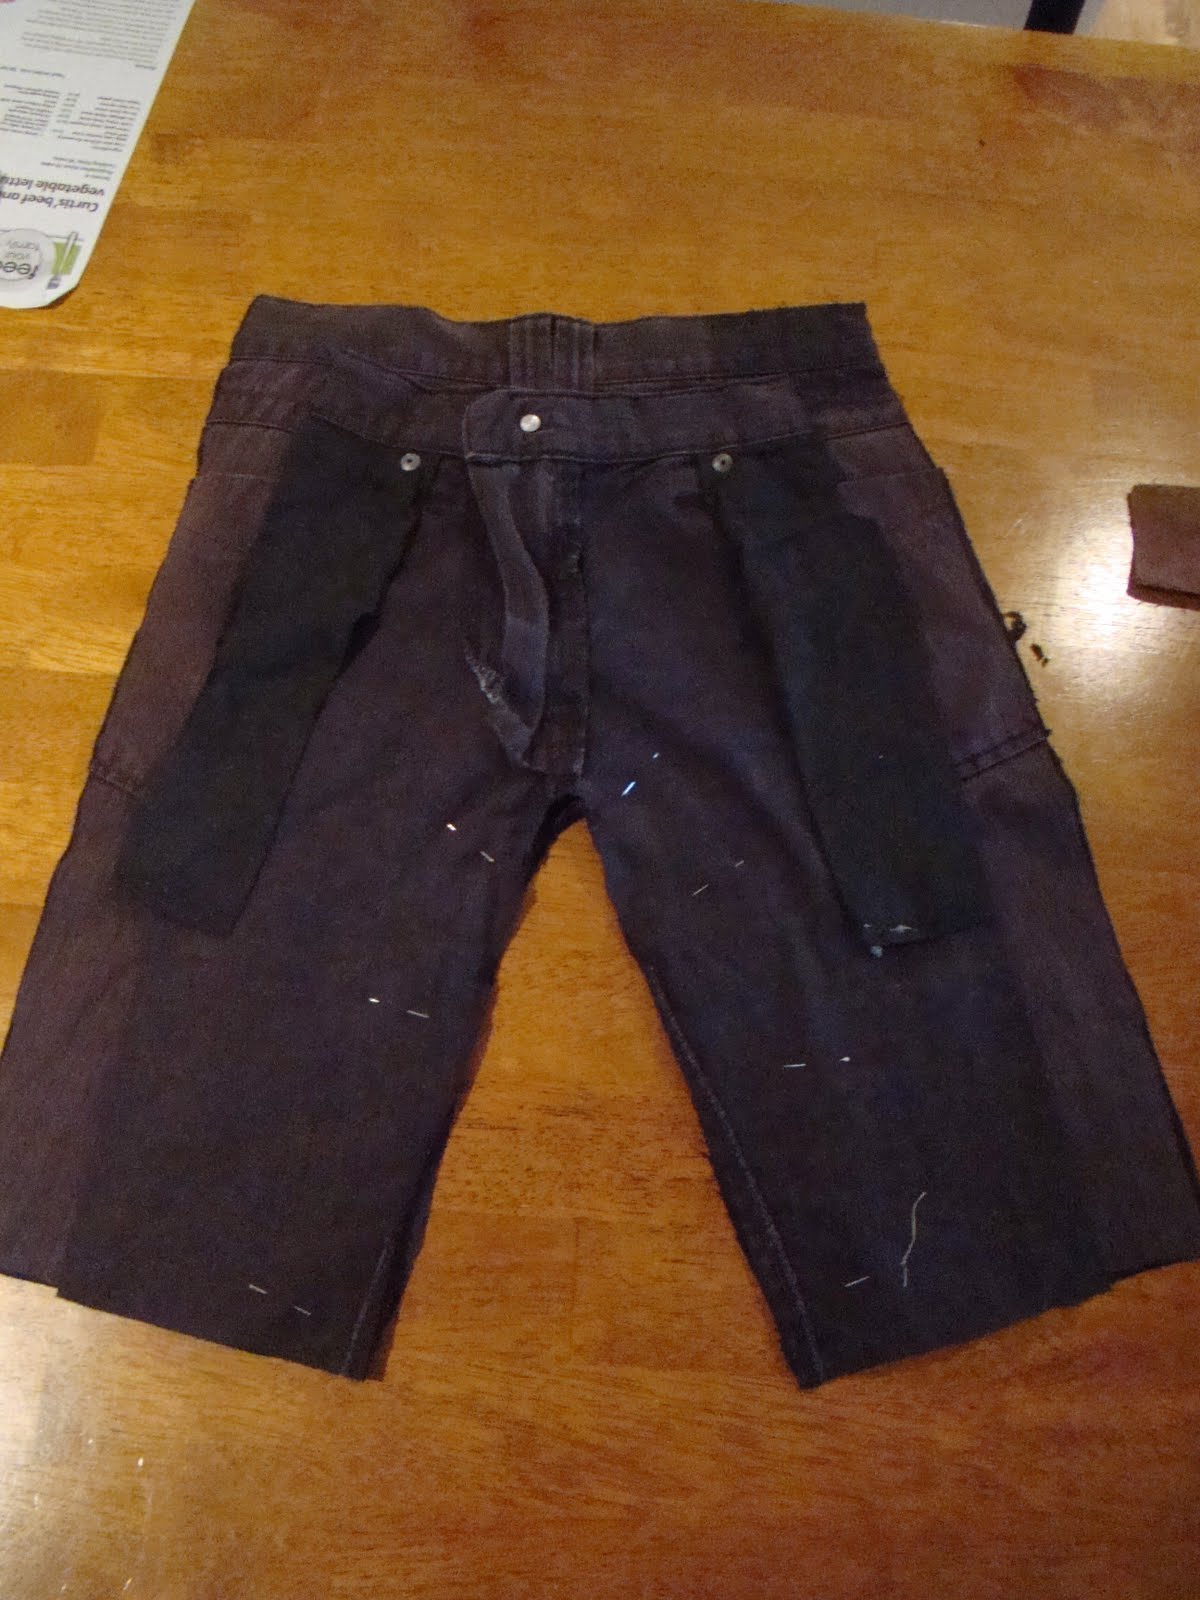
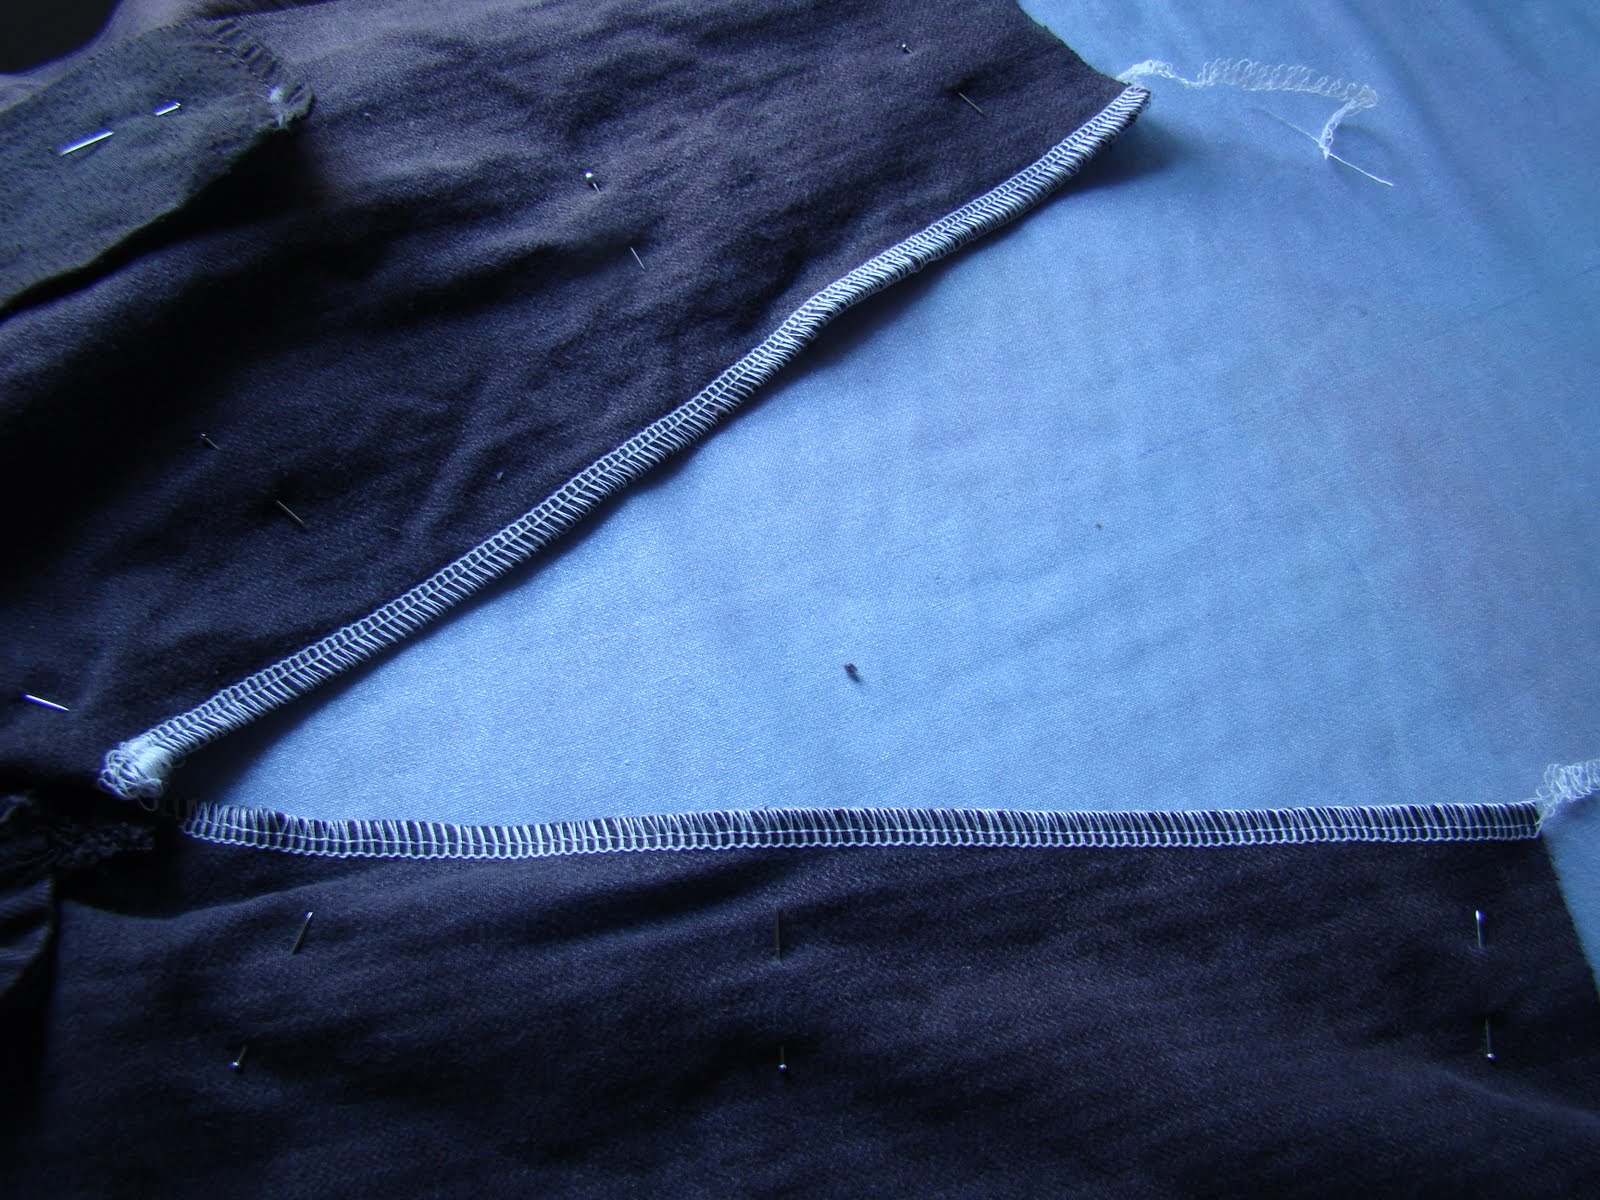
If you don’t have an overlocker, do a zig-zag stitch in the seam allowance before sewing with a machine, or just sew the seam and don’t worry about finishing off.
Step 7. Cut a length of elastic approximately an inch longer than the width of the front panel, and put a safety pin in one end:
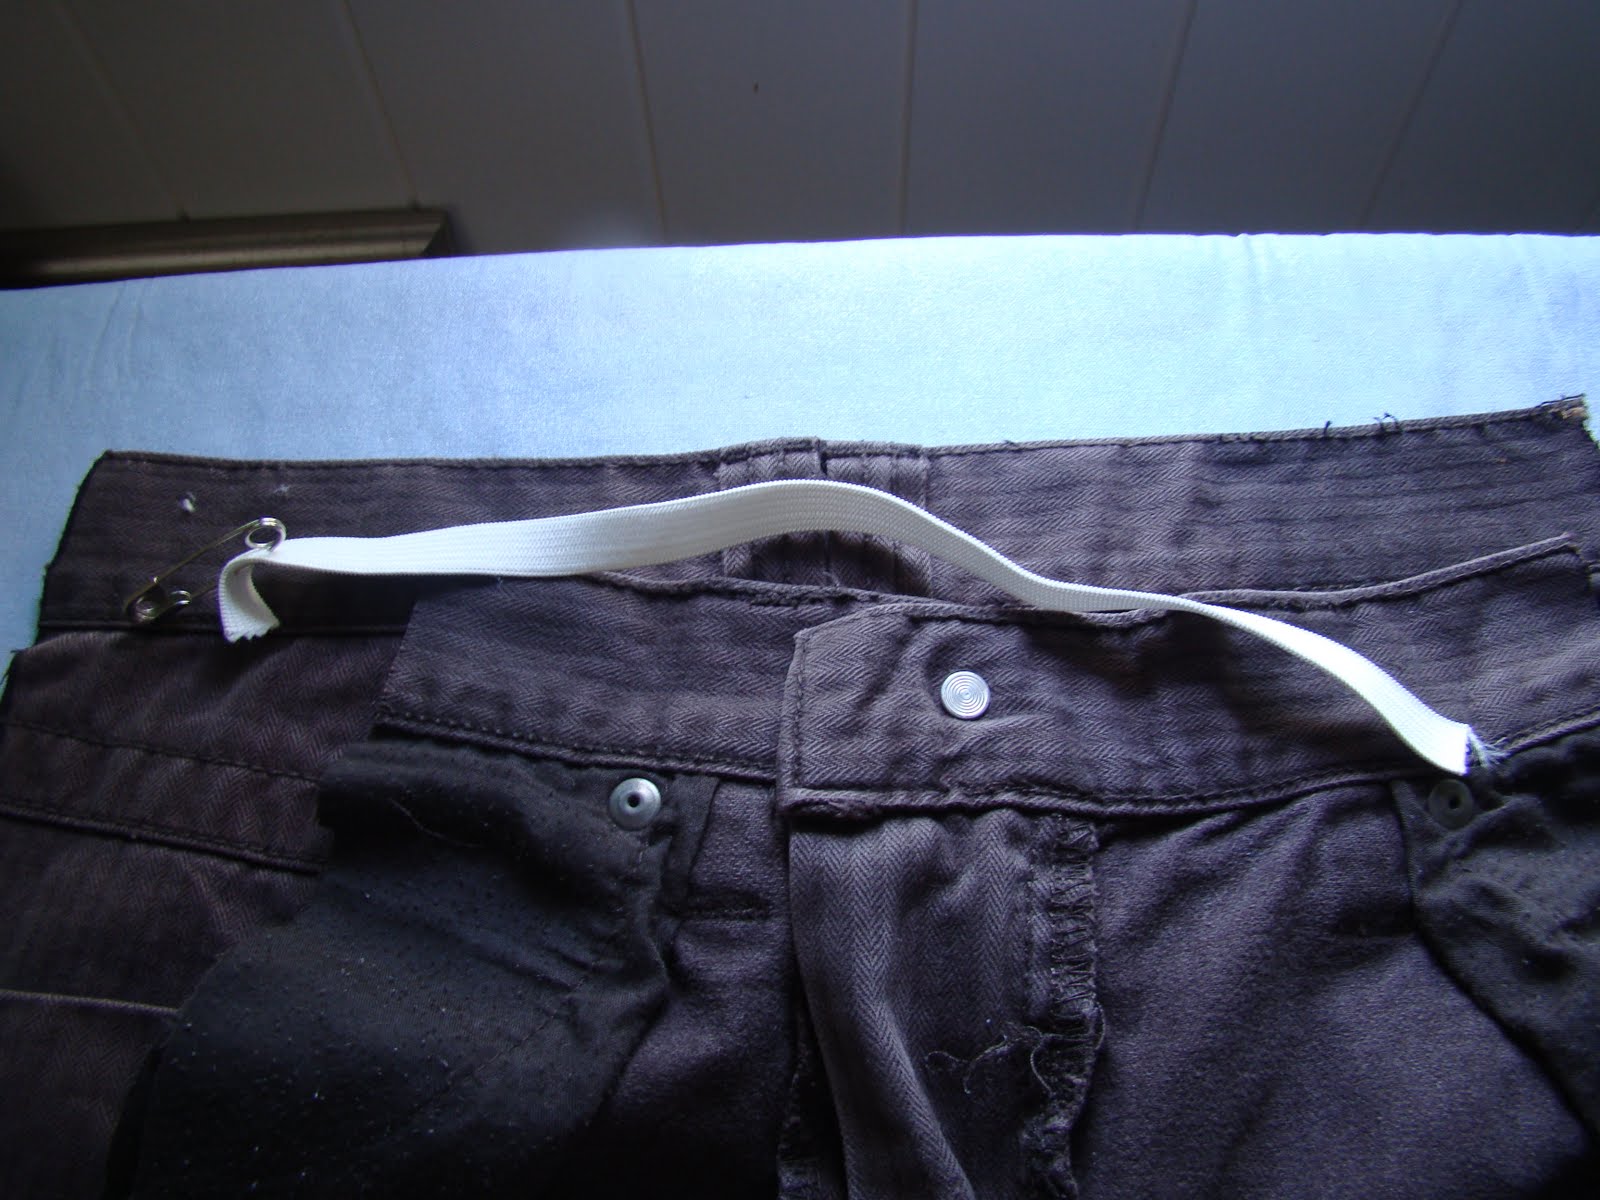
Step 8. Thread the elastic through the waistband of the back section of the pants, pinning the non-safety-pinned end, so you don’t pull it all the way through:
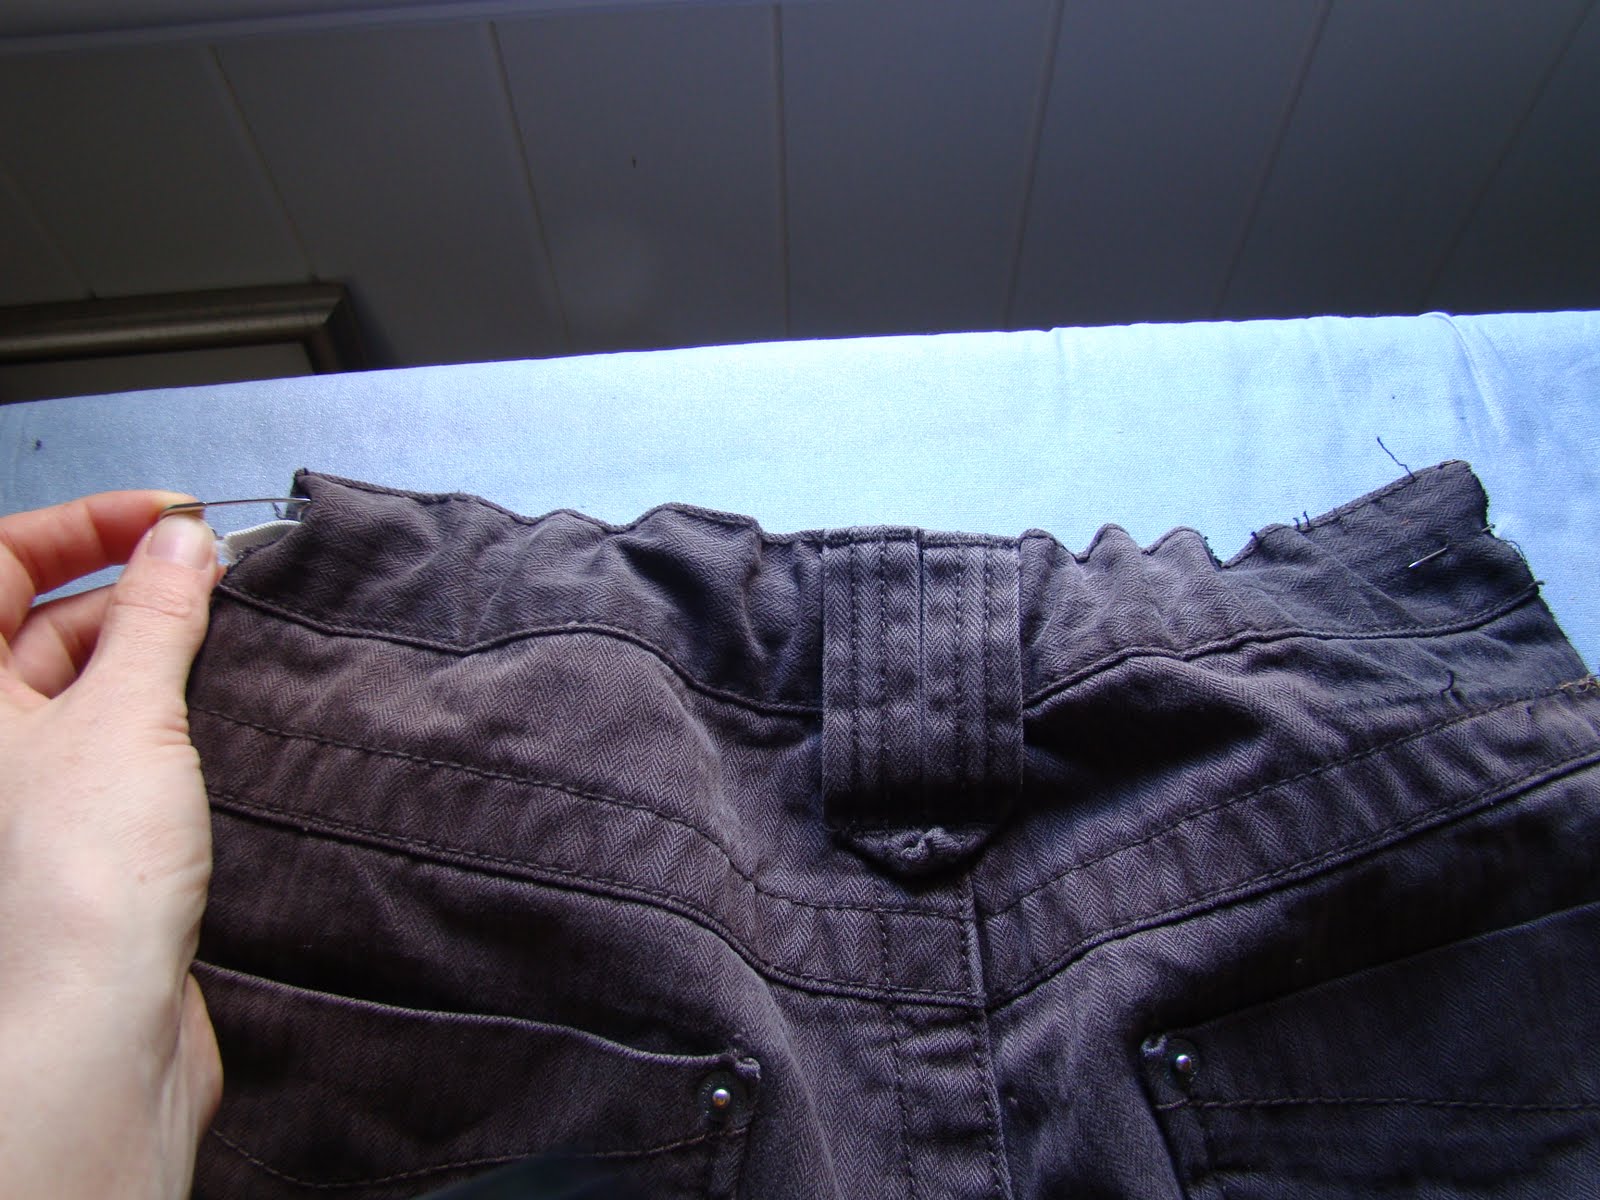
Pin the elastic at both ends with a small section hanging out of the waist band (to make sure you sew through it).
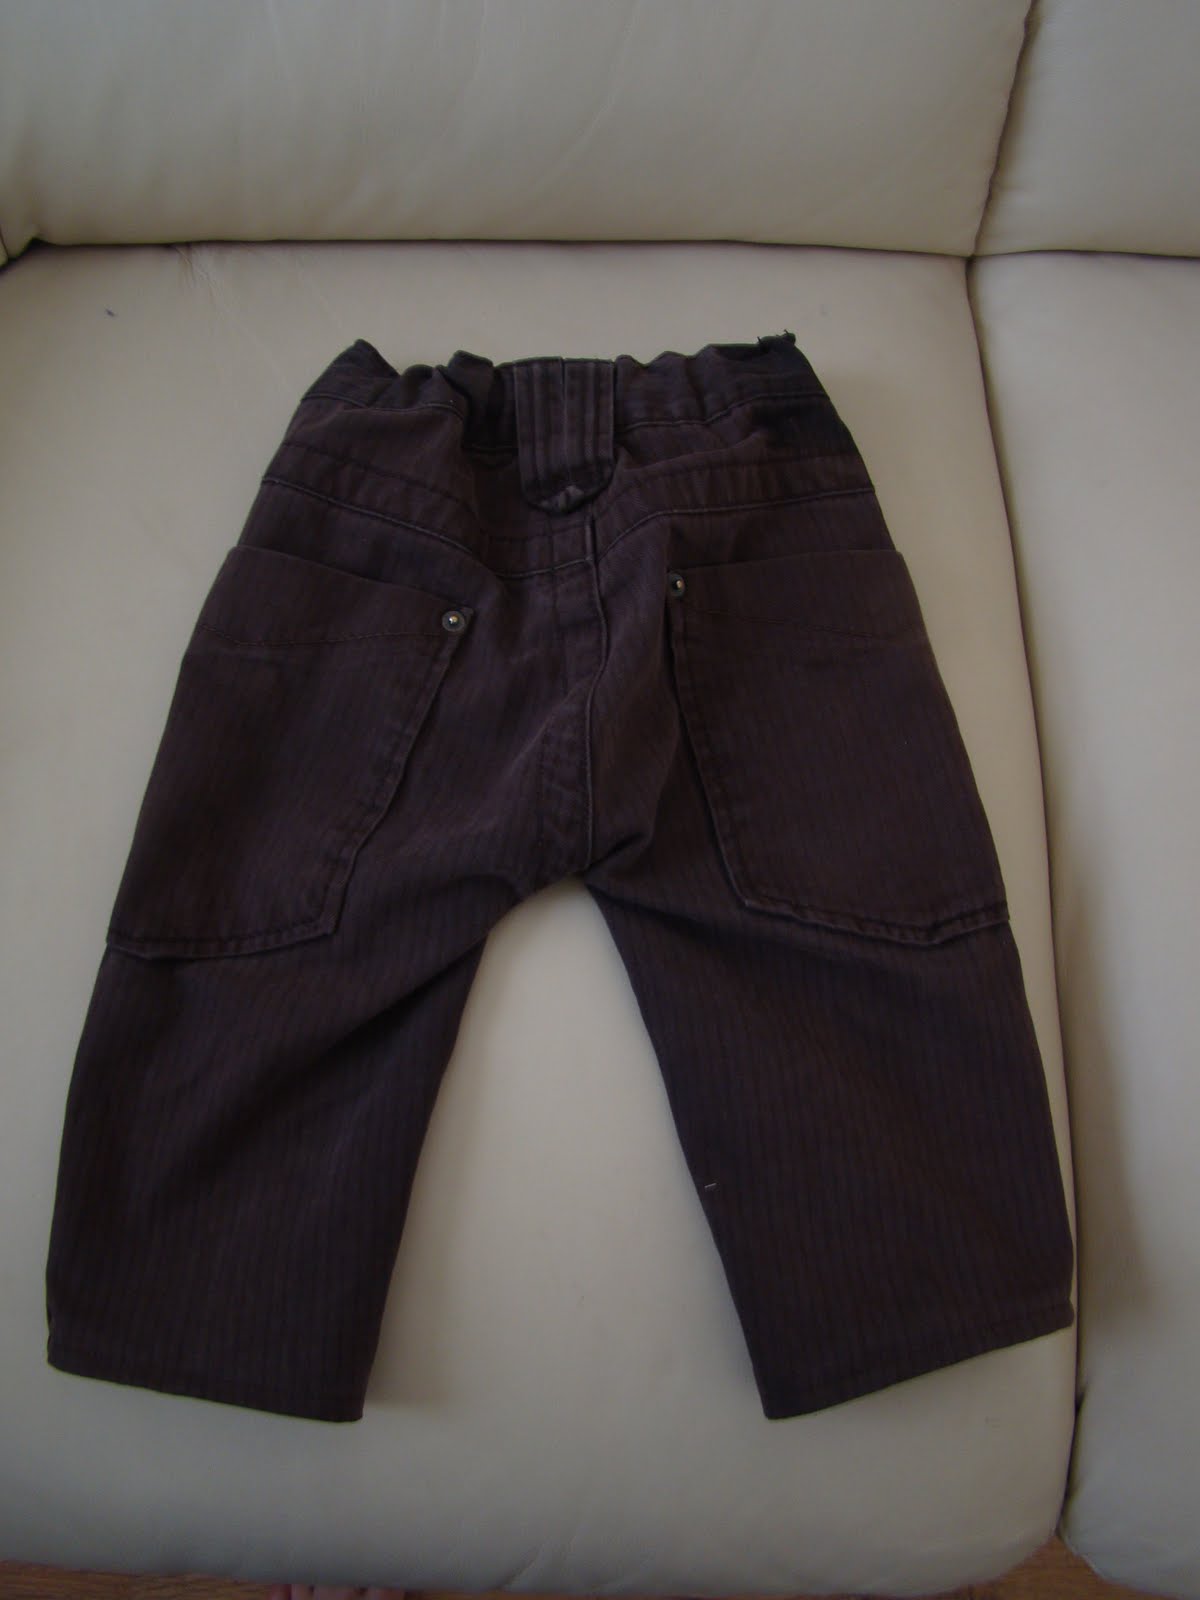
Step 9. Pin the front and back pieces of the pants together for the side seams, and sew, as per the inner leg seam (ie I serged/overlocked, and then machine sewed again). I sewed through all pocket material to create little pockets in my pants.
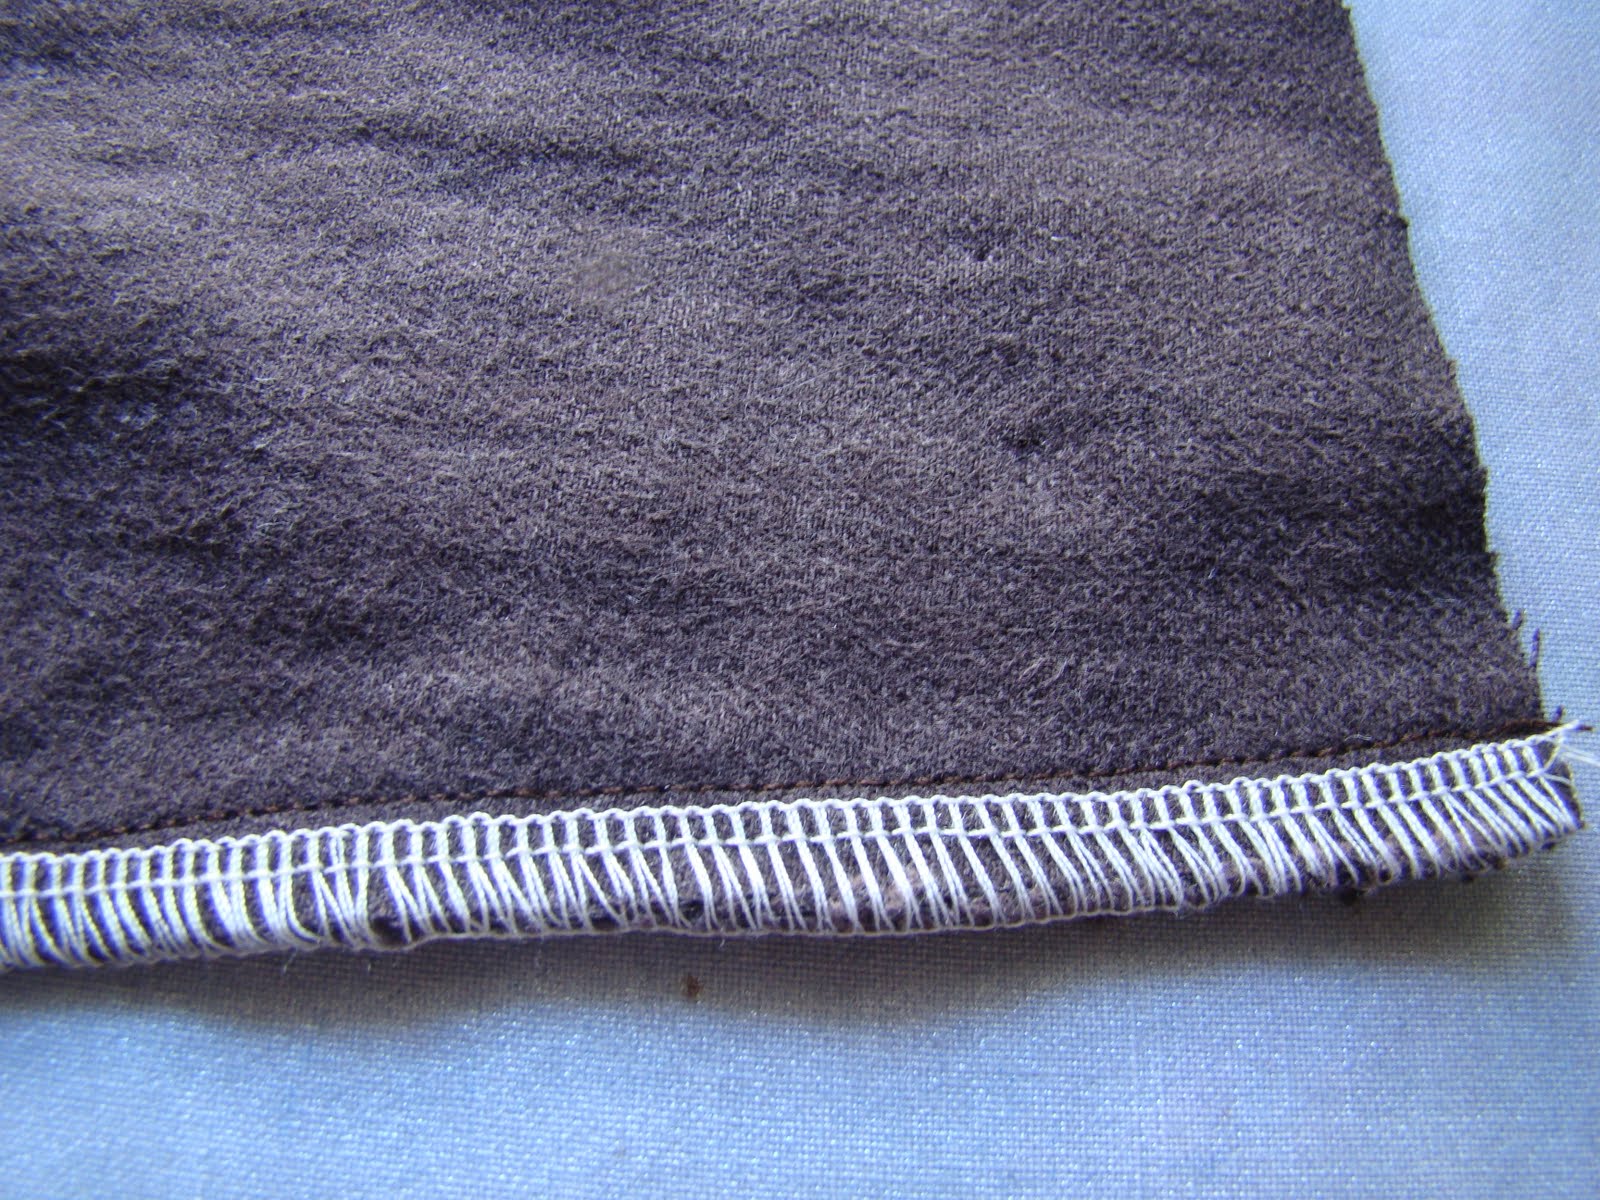
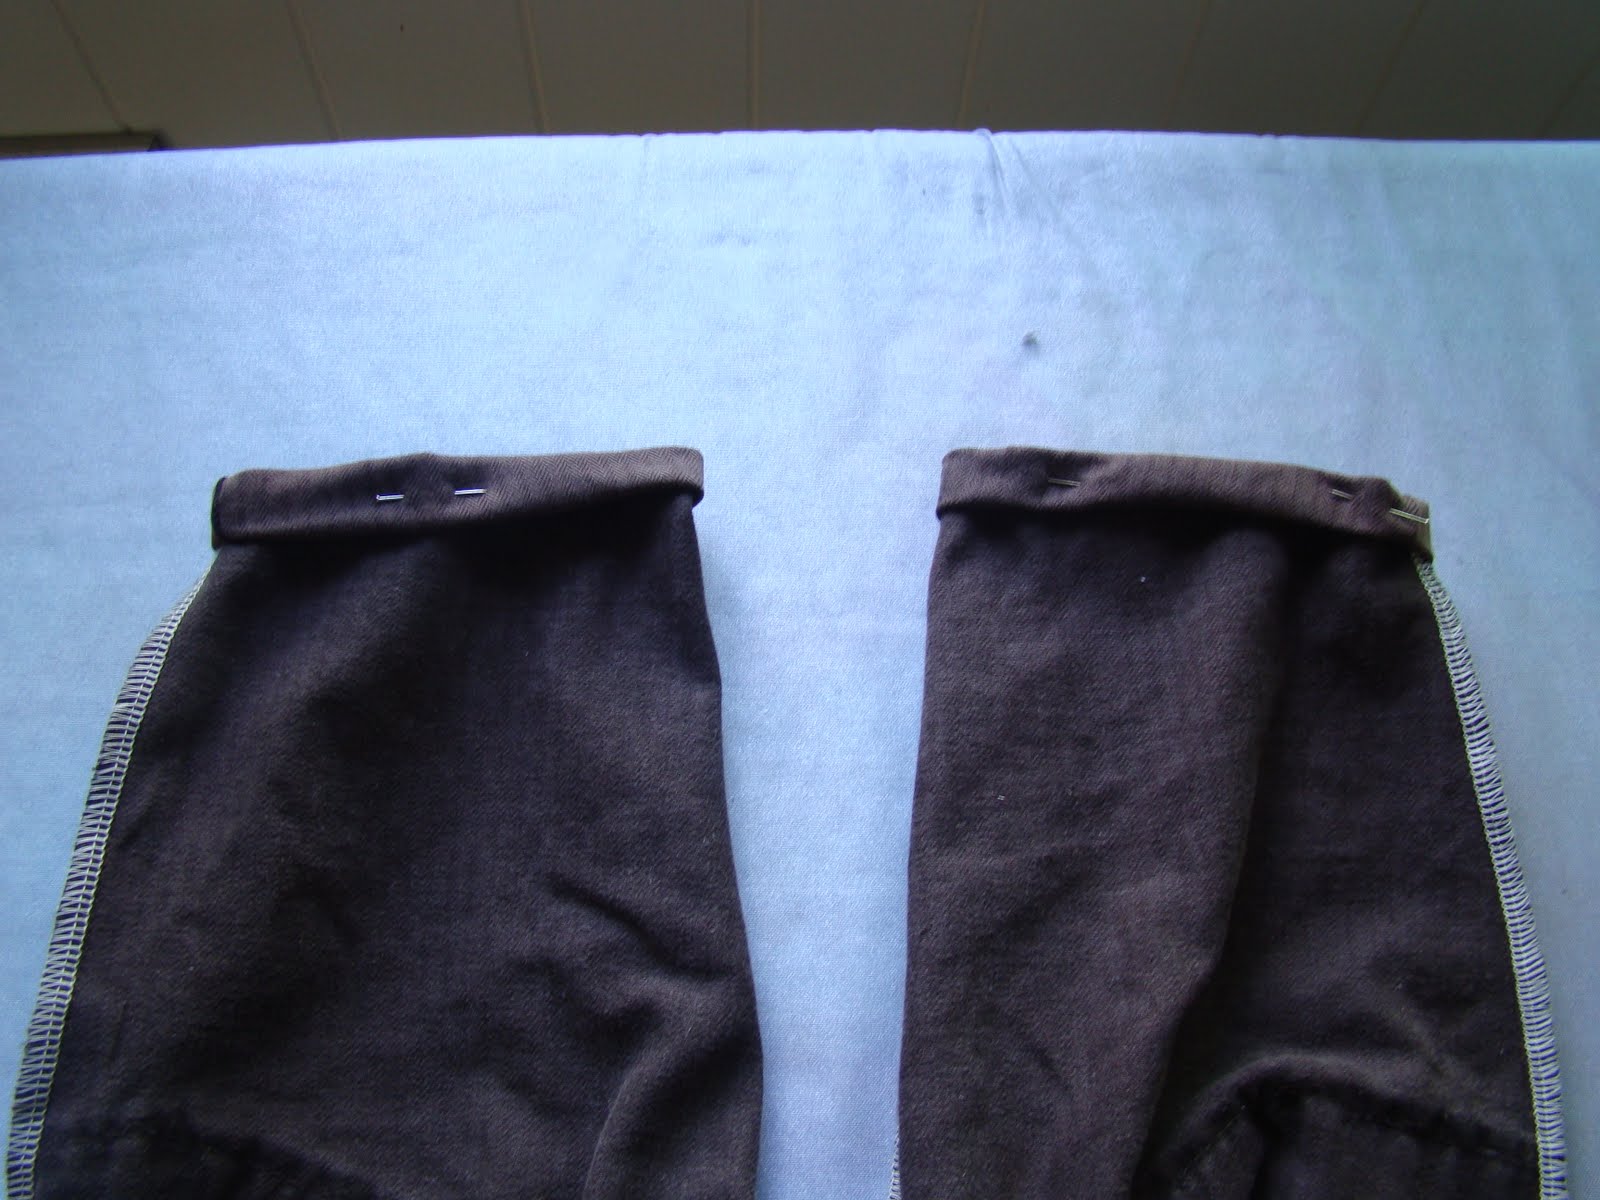
Step 10. Double-fold over the hem for each leg, pin and sew with your sewing machine (or hand-sew a blind hem, if you prefer).
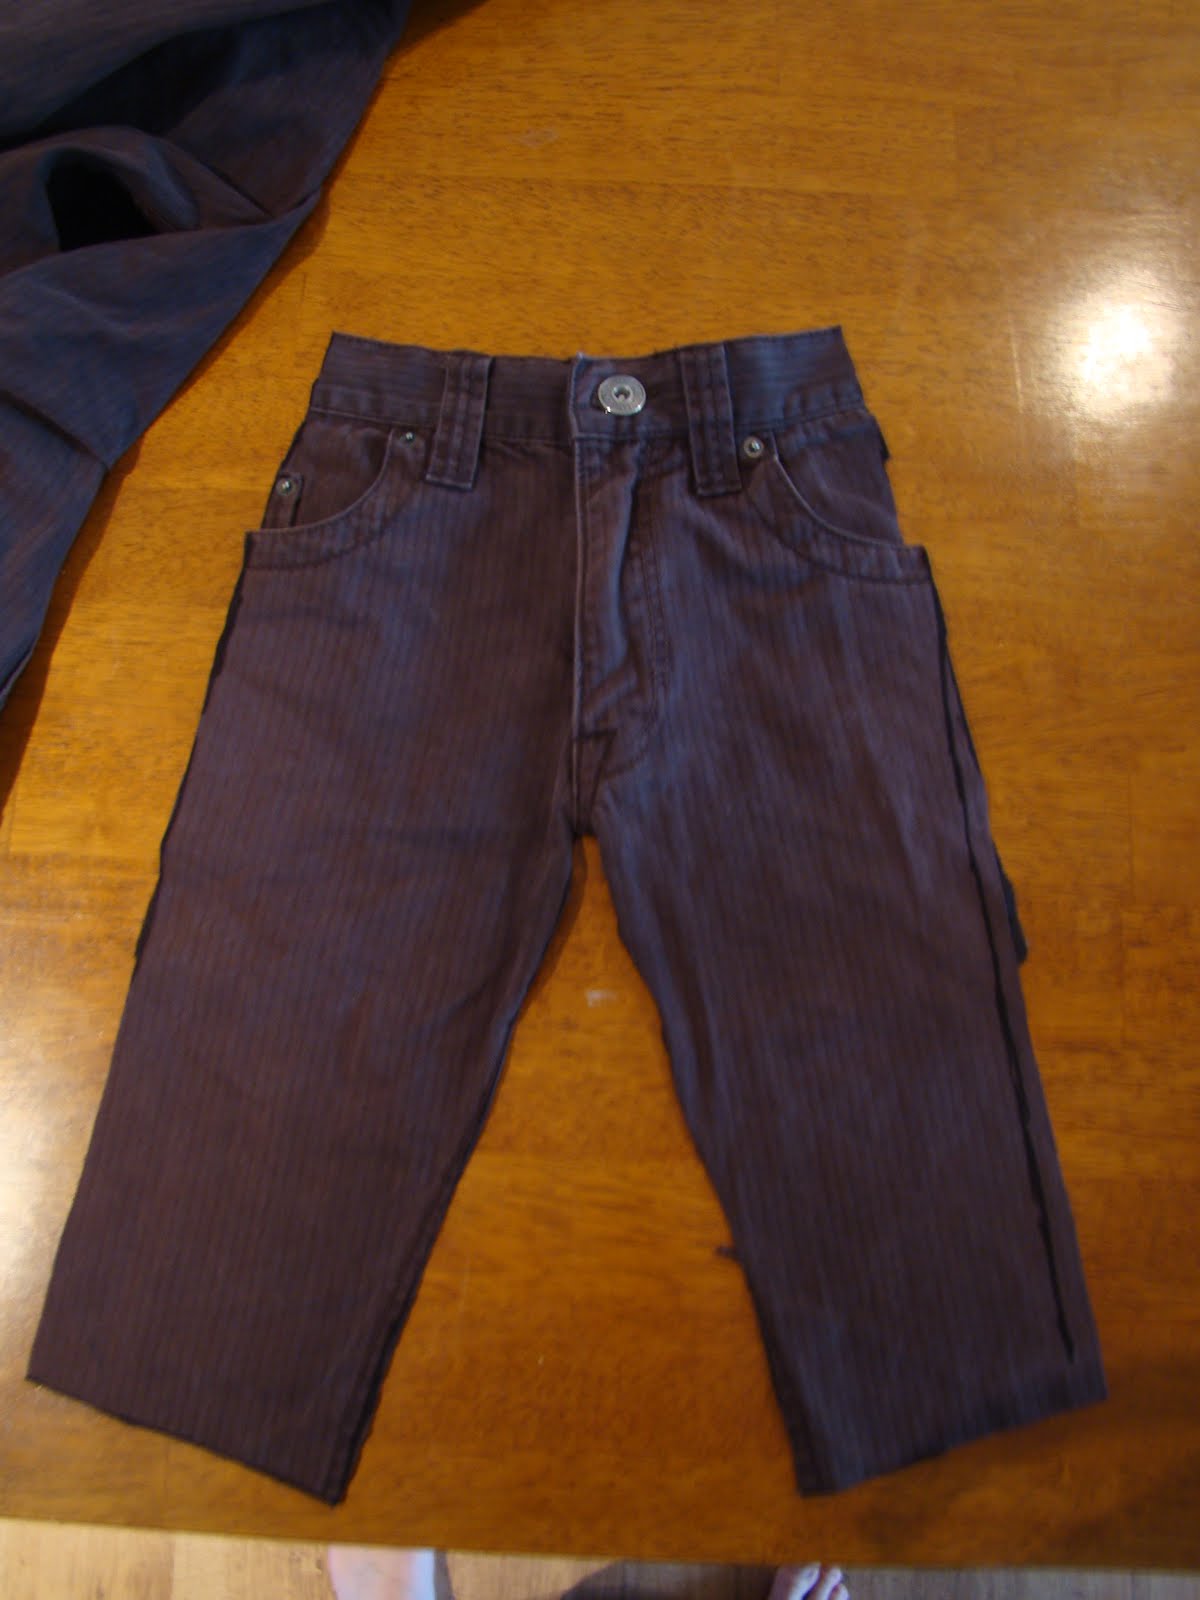
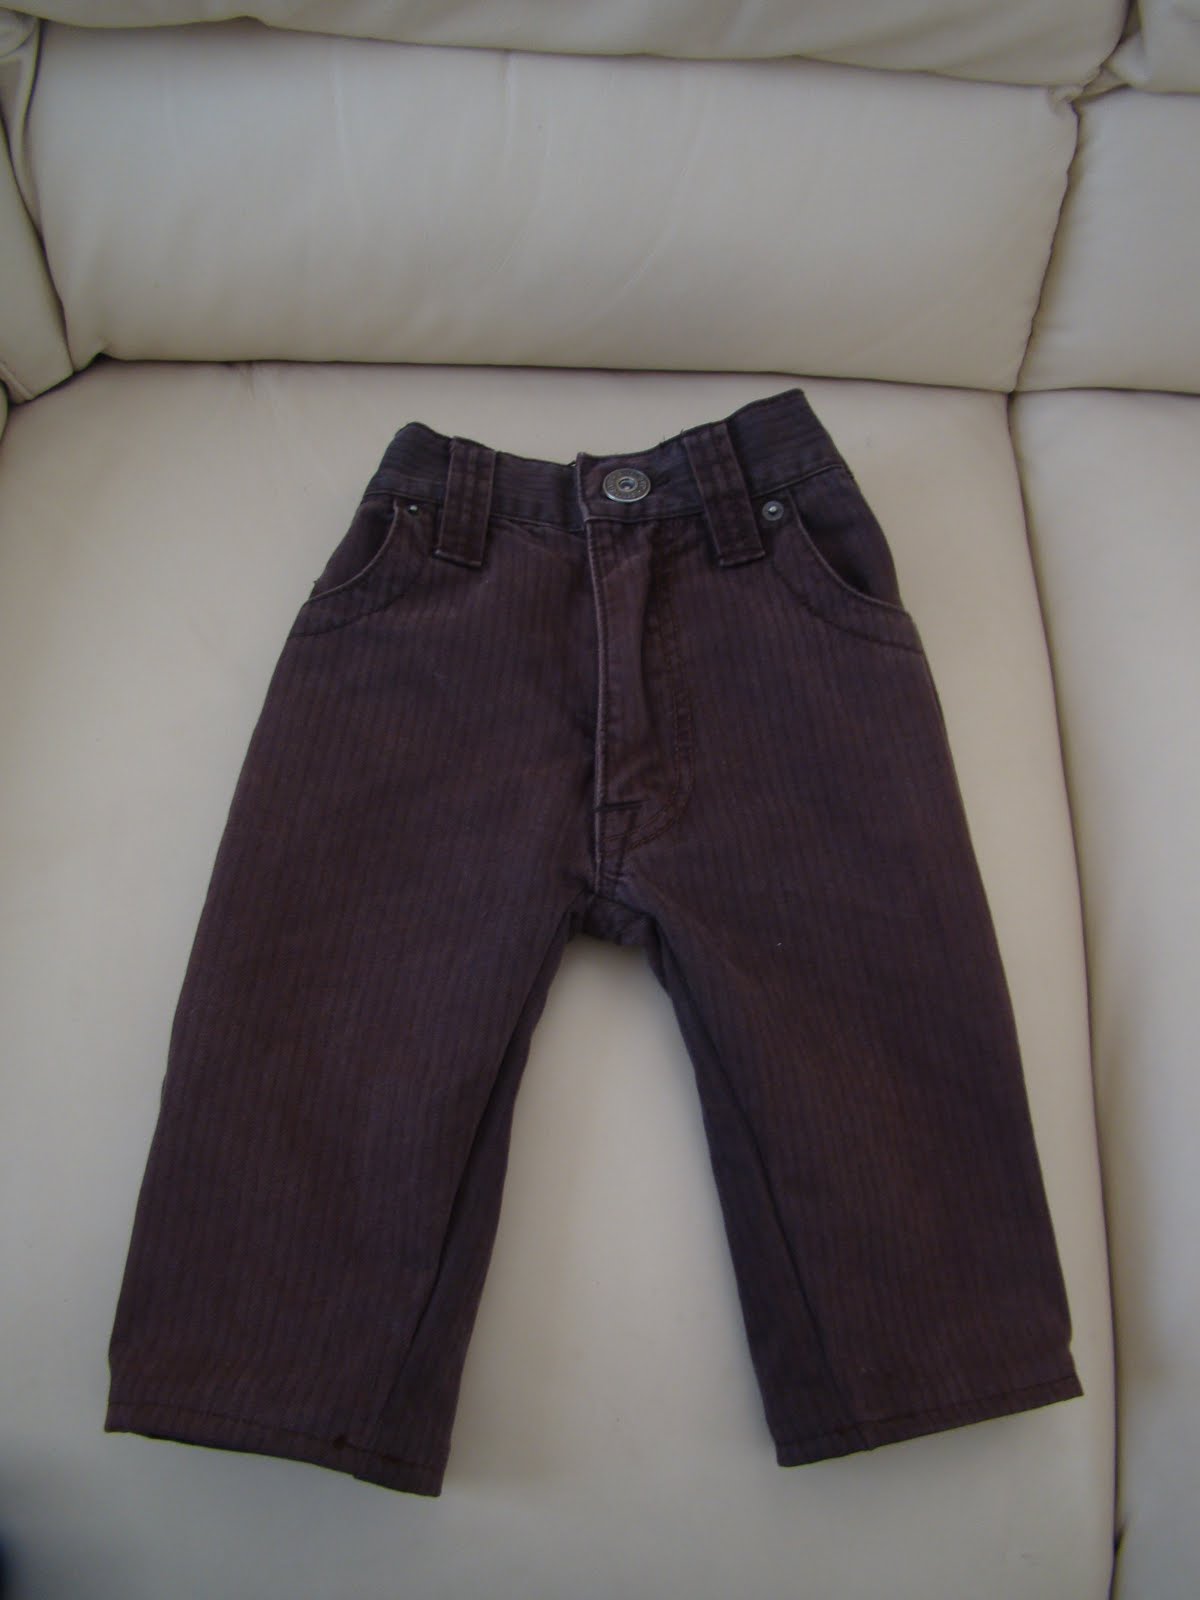
Step 11. Turn your pants right-side out and admire your handiwork:
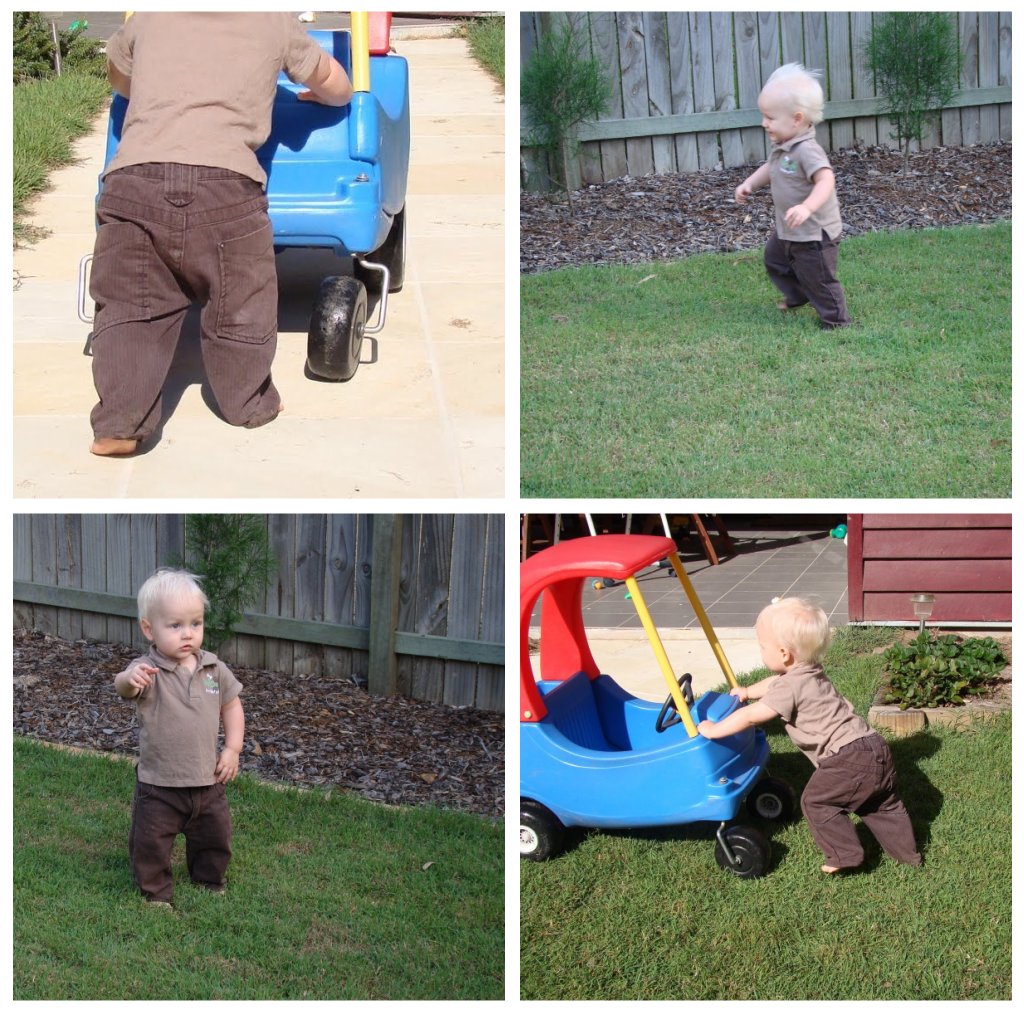
Step 12. Find a small person to model the pants for you:
Wow! I’m amazed. They turned out so well! Great tutorial, thank you!
O.K. this is awesome! I can’t wait to give it a try. Thanks for the great tutorial.
twincess.blogspot.com
So neat.. think I will try this myself.
This is so great – haven’t seen anything like it! I was just at the thrift store today wondering if I could make pants for my 2 year old out of mens’ pants!
Wow……very clever.
Thanks for sharing and the great tutorial.
What a great idea!!! I linked to your tutorial over at Craft Gossip Sewing:
http://sewing.craftgossip.com/tutorial-make-a-pair-of-toddler-pants-from-mens-jeans/2010/07/11/
–Anne
I’ve wanted to do this also, but never got around to figuring out how… great job and thanks for sharing! I will for sure try this!
This was amazingly easy, thank you for sharing!
wow now that is recycling! Well done! Clever lady!
I just love these!!!
Jana
I knew there was something I could do with those crappy Old Navy jeans that don’t fit me right! I’ll definitely try this. Thanks!
ohhh, great idea, thanks!!!
😉
That is such a cute idea! I’ll have to look around for some old mens jeans!
you are a GENIUS!!!! i am definately going to make a pair…you make it look so easy…thank you!!! 🙂
-heather
These are great, it’s not everyday you see a style like this. Usually mens jeans are very generic and plain.
That’s fantastic! Thanks for doing the tutorial!
I can’t wait to make a pair of these for my boy! TFS!
This tutorial is great. I used it and posted pics in the KCWC flickr pics. I’m pretty sure you saw it there. Anyway, I’ve added a link to this on my blog’s to do list. Everytime my little guys wears his pants, I smile. They ook great on him!
This is great!
I know it’s not the “right” way to do it, but on pants that small, I would probably hem them before sewing up the final seams – it would just be easier to get at them that way.
A brilliant idea!!!
Congratulations, very clever!
If you don’t mind I link it on my blog http://creamamma.blogspot.com/
Thanks
Love these too!
Cute!
good idea these really good and great work………………Louis Philippe tshirts http://www.trendin.com/louisphilippe/mens-t-shirts-6